Author: Louis Liu

  • A guide for preparing for the William Lowell Putnam Mathematical Competition

    A guide for preparing for the William Lowell Putnam Mathematical Competition

    The introduction (including the outline and syllabus) of the Putnam Maths Competition:

    Power Putnam Preparation — UT

    William Lowell Putnam Mathematical Competition — AoPS

    The textbooks that could provide a systematic intro study for the Maths Competition:

    数学奥林匹克小丛书

    My apology: Sorry that this textbooks series seems to have no English version.

    If you don’t have any past experience in the Maths Competition like MO (Maths Olympiad), (and neither do I), I strongly recommend you to read this textbooks series, since this is a very popular introductory Maths Competitions textbooks series in China for Maths Competitions beginners (BTW I’m currently reading it and I have to say it is so good!!!). And reading this textbooks series from middle-school volume to high-school volume would help you to build a very solid knowledge system for Maths Competitions, so please don’t feel embarrassed to start from the beginning — reading the middle-school volume part, even though you’re a undergraduate student now like me 🙂

    And after you finish reading the 数学奥林匹克小丛书, here is a harder and more advanced textbooks series for higher level Maths Competitions studies:

    数学奥林匹克命题人讲座

    My apology: Sorry that this textbooks series seems to have no English version either.

    In addition to the above, I would also suggest that you could search on the Internet to check out others’ comments on these textbooks before reading, because that may help you to avoid some bad contents or chapters and could save you a lot of times and energy in reading. Besides that, you should also try to check out the Maths Competitions textbooks with others suggested, because mine recommendation may not the most suitable choice for you, it is all possible…

    In short, please try to make the best textbook choice possible before you start slogging away, because that could help you to approach an efficient study pace and accelerate your progress indeed.

    The exercise books for preparing the Putnam Maths Competition:

    Resources for Putnam Problems — UIUC

    Talent, training and direction are the key factors to become a master.

    So keep practicing!

    One more thing, if you find yourself struggling with studying the Maths Competitions contents extremely hard, you better:

    • Keep going (maybe this part is just that tough?)
    • Get another textbook (maybe the textbook you are reading right now does not fit you?)
    • Quit if necessary (it is quite normal and there is no need to feel disappointed with yourself because maybe your talent is in the other fields? So it would be more wise for you to stop wasting time on it and try to find the area that you’re interested in)

    And…Good luck, my friend!


  • Why mathematicians choose “A linear subspace must have the additive identity” as one of the condition of the linear subspace but not “A linear subspace must be nonempty” ?

    Why mathematicians choose “A linear subspace must have the additive identity” as one of the condition of the linear subspace but not “A linear subspace must be nonempty” ?

    When I first meet that condition (A linear subspace must have the additive identity) in the book of “Linear algebra done right”, I felt it could be derived from “A linear subspace must be nonempty” + “A linear subspaces is closed under linear operations”, which indicated that “A linear subspace must be nonempty” is a more fundamental condition than “A linear subspace must have the additive identity”. So at that time, I believed that the replacement would definitely be correct, but I didn’t really think through why mathematicians choose that not-most-fundamental one as a condition until I was introduced to Modern Algebra…

    From the perspective of Modern Algebra, “A linear subspace must have the additive identity” is a more fundamental condition: Let me pull out a thing with the similar algebraic structure as an example — submonoid, its conditions also include “A submonoid must have the binary-operation identity of the monoid it is contained in”, but here we cannot replace this with “A submonoid must be nonempty”:

    Because let we construct a submonoid $(X,*)$, where

    $$ X = \left \{ \begin{bmatrix} x & 0\\\ 0 & 0 \end{bmatrix} \mid x \in \mathbb{R} \right \} \subset R^{2 \times 2} = \left\{ \begin{bmatrix} a & b\\\ c & d \end{bmatrix} \mid a,b,c,d \in \mathbb{R} \right \} $$

    And $*$ is the matrix multiplication.

    If we choose “A submonoid must be nonempty” not “A submonoid must have the binary-operation identity of the monoid it is contained in” as the condition, then $\begin{bmatrix} 1 & 0\\ 0 & 0 \end{bmatrix}$ would be the matrix multiplicative identity of the submonoid $(X,*)$, but this would conflict with the matrix multiplicative identity of the monoid $(R^{2 \times 2},*)$ which it is contained in, which is the $\begin{bmatrix} 1 & 0\\ 0 & 1 \end{bmatrix}$. Accordingly, “A submonoid must have the binary-operation identity of the monoid it is contained in” is proved to be a correct condition.

    Now, let’s get back to the topic of subspaces: Though the algebraic structure of the linear space allows the replacement of “A linear subspace must have the additive identity” with “A linear subspace must be nonempty” for the linear subspaces, considering other algebraic structures, it would be way more convenient if mathematicians use a generalized condition, and that’s why I think they finally choose “A linear subspace must have the additive identity” for the linear subspace, but not “A linear subspace must be nonempty”.


  • A simple physical approach to understand the Taylor series

    A simple physical approach to understand the Taylor series

    I still remember the first time that I meet the concept of Taylor series was in one AP calculus textbook. It’s kind of a pity that the AP calculus textbook I was reading at that time didn’t give any further explanation about why and how this formula came up, etc. So I just questioned myself about its formation and finally I did figured it out at that time by using the knowledge I’ve learned in Physics. I guess you may wonder why wouldn’t I just search on the Internet and see the proof of Taylor series, in fact, I did do that, but didn’t work for me at that point, since I lack too much Maths knowledge to understand that proof. Therefore I found a new way to help myself understand the Taylor series at that time.

    Firstly, let us derive the displacement formula with acceleration in one dimension (so we use the scalars here instead of vectors):

    $$ \begin{aligned} \frac{\mathrm{d} x}{\mathrm{d} t} &=v_t \\ \\ \mathrm{d} x&=v_t \times \mathrm{d} t \\ \int_{t_0}^{t} \mathrm{d} x&= \int_{t_0}^{t}\left(v_t \right) \ \mathrm{d} t \\ x_t&=\int_{t_0}^{t}\left(v_t \right) \ \mathrm{d} t + x_0 \end{aligned} $$

    Similarly, we can use the same deriving method of:

    $$ \frac{\mathrm{d} x}{\mathrm{d} t} = v_t \quad \Rightarrow \quad x_t=\int_{t_0}^{t}\left(v_t \right) \ \mathrm{d} t + x_0 $$

    To get:

    $$ \frac{\mathrm{d} v}{\mathrm{d} t} = a_t \quad \Rightarrow \quad v_t=\int_{t_0}^{t}\left(a_t \right) \ \mathrm{d} t + v_0 $$

    Then we substitute $v_t$ into $x_t$ , we would have:

    $$ x_t=\int_{t_0}^{t}\left(\int_{t_0}^{t}\left(a_t \right) \ \mathrm{d} t \right)\ \mathrm{d} t + v_0(t-t_0) + x_0 \tag{1} $$

    Note that since $a_t$ is a constant (In fact, this is related to the Principle of least action in Physics: We assume that the accleration of any system must be a constant,
    in other words: $\dfrac{\mathrm{d}^3 (x)}{(\mathrm{d} t)^3} = 0$ ), therefore we could get our displacement formula with acceleration:

    $$ x_t=\dfrac{a_t(t-t_0)^2}{2}+v_0(t-t_0)+x_0 $$

    But the problem is: What if $a_t$ is not a constant anymore (And that situations do happen a lot in real life), for example, have you heard about presence of jerk ( $j_t =\dfrac{\mathrm{d} a}{\mathrm{d} t}$ ) before?

    Then we need to deal with the equation $(1)$ again, through using the same deriving method stated above, we could get:

    $$ \frac{\mathrm{d} a}{\mathrm{d} t} = j_t \quad \Rightarrow \quad a_t=\int_{t_0}^{t}\left(j_t \right) \ \mathrm{d} t + a_0 $$

    Next we substitute $a_t$ into $x_t$ , we can have:

    $$ x_t=\int_{t_0}^{t}\left(\int_{t_0}^{t}\left(\int_{t_0}^{t}\left( j_t\right) \ \mathrm{d} t \right) \ \mathrm{d} t \right) \ \mathrm{d} t + \dfrac{a_0(t-t_0)^2}{2}+ v_0(t-t_0)+ x_0 $$

    And using some derivatives form to substitute in that equation:

    $$ x_t=\int_{t_0}^{t}\left(\int_{t_0}^{t}\left(\int_{t_0}^{t}\left( j_t\right) \ \mathrm{d} t \right) \ \mathrm{d} t \right) \ \mathrm{d} t + \dfrac{\ddot{x}_t|_{t=t_0}(t-t_0)^2}{2!}+\dfrac{\dot{x}_t|_{t=t_0}(t-t_0)}{1!}+ \dfrac{x_{t=t_0}}{0!} $$

    $$ \text{Where } \dot{x}_{t} = \dfrac{\mathrm{d} x}{\mathrm{d} t}, \ddot{x}_{t} =\dfrac{\mathrm{d}^2 x}{(\mathrm{d} t)^2} \text{ and so on.} $$

    Now I believe that you could clearly see the presence of the Taylor series in this equation right?

    Therefore if we keep iterating using the same method and let $x_{t}=f(t)$ , we would be able to get the real Taylor series formula:

    $$ f(t)=\sum_{n=0}^{\infty }\left( \frac{f^{(n)}(t)|_{t=t_0}}{n!} \left(t-t_0\right)^{n}\right) $$

    This also indicate us the essence of Taylor series: Knowing all of its $n$th ($n$ is natural numbers) derivatives value at one point is equivalent to Knowing the primitive expression of a function.


  • Intro to the Colemak keyboard layout

    Intro to the Colemak keyboard layout

    Nowadays, most people are using the QWERTY keyboard layout, because the QWERTY is the default the keyboard layout for nearly all the computers.

    But is the default one the best? Probably not…

    Here is a heatmap for the QWERTY keyboard layout (from Keyboard Heatmap Visualization), and where the color depth represents the frequency of the key is pressed during the daily typing.

    The QWERTY layout was designed in the 19th century. Colemak is a modern alternative to the QWERTY and Dvorak layouts, designed for efficient and ergonomic touch typing in English. Learning Colemak is a one-time investment that will allow you to enjoy faster and pain-free typing for the rest of your life. Colemak is now the 3rd most popular keyboard layout for touch typing in English, after QWERTY and Dvorak and comes pre-installed on Mac and Linux systems. — www.colemak.com

    And here is the heatmap of the Colemak keyboard layout (from Keyboard Heatmap Visualization).

    Two heatmaps’ contrast shows that the Colemak keyboard layout seems to have a more concentrated typing area for both hands, therefore using Colemak layout could increase the efficiency of typing. BTW, there are still many other keyboard layouts, but I’ll not introduce here, you can check them and their heatmaps out through visiting the Keyboard Heatmap Visualization.

    Then how would I be able to switch my keyboard layout to the Colemak one? And can I still keep the QWERTY because I want to switch back sometimes?

    Of course!

    For Windows OS: Since it does not have build-in Colemak layout, so we can visit Colemak, then click on the “Download” under the “Navigation” in the left column. Once the download is ready, you could open the folder, and click on the “setup.exe” file. And when the setup process is finished, you can now switch between the Colemak and QWERTY keyboard easily by pressing the shortcut: ⊞ Win + Space bar.

    For Mac OS: Luckily, Mac OS has many build-in keyboard layouts including Colemak and Dvorak, etc. So you can directly visit System Preference -> Keyboard -> Input Sources -> + -> English -> Colemak -> Add, then the setup is done. you can now switch between the Colemak and QWERTY keyboard layout easily by pressing the shortcut: Ctrl + Space bar.

    How can I practice and be familiar with this new keyboard layout?

    I highly recommend this website for practicing typing: www.keybr.com, because in this website, you could not only choose different keyboard layouts, but also customize the typing difficulty and certain typing keys that you want to practice. And you could always see the keyboard layout that you choose when practicing on this website, it is so helpful right?

    I also want to mention that I suggest you better not forget the use of QWERTY, because now, most people are still using it, not Colemak or other keyboard layouts. And if you do so unfortunately, you would probably not able to use others’ Window-OS-computer in the future.


  • My experience of U.S. Visa interview in Guangzhou China

    My experience of U.S. Visa interview in Guangzhou China

    Note: This post is an English adaptation of my original Chinese article (URL). Some parts have been modified for clarity, cultural relevance, or to better fit the English-speaking audience. The original Chinese text is provided on the next page (2nd page) of this post for reference and comparison.

    Just noting down my experience with the face-to-face interview at the American Consulate in Guangzhou today:

    We scheduled the interview for 9:15 on July 7, 2022. My DS-160 indicated Shanghai because that’s what I selected online when filling out the form. However, due to lockdown policies, the U.S. Consulate in Shanghai was closed, so I had to book the appointment in Guangzhou instead, which is why the appointment confirmation form shows Guangzhou. The day before going to Guangzhou, I realized the address on my DS-160 was different from the one on the appointment confirmation form and thought I had to refill it and reschedule (since the DS-160 can’t be changed, only resubmitted). But after checking the official website, I found out this discrepancy was not a problem. Phew, what a relief, haha.

    Today, we first stored our backpacks and cellphones at a newsstand near the entrance of the consulate (initially, while we were waiting for the traffic light, someone from the newsstand told us we could store our items there. At first, I was worried about the risk since it seemed a bit informal, but my companion reassured me that there was no storage inside the consulate and that they had seen tips on Zhihu about storing items at nearby newsstands, so I was reassured). Then we took the necessary documents and went inside the consulate.

    First, we queued up, and during this, a staff member would ask about the time we had scheduled for our interview and would need to see our appointment confirmation form (as it displays the scheduled time). Next, another staff member would ask us to take out our passports and I-20 forms (you need to remove your passport from its cover and hold it together with the I-20), then she would check the information and stick a barcode on the back of the passport. Then we went through security, where everyone was required to put their materials into a bag and then put it through the X-ray machine. Meanwhile, we walked through a metal detector. Oh, and the staff told me to expose my ears, probably because my hair was too long and covered them, haha. But after passing through security, I let my hair down again, and it didn’t affect the interview process. I suppose they just needed to make sure you aren’t wearing any earphones at the security checkpoint. After that, we queued up for the formal interview area. Before entering, a staff member would tell you which window to go to (but actually changing windows wouldn’t really affect anything, as it was just to maintain order and balance the queue lengths at each window). I was initially assigned to window 6, but there were many people ahead of me, so I switched to window 5. However, this wasn’t actually the moment for the formal interview yet; it was actually just for checking the documents. The staff member at the window asked for my I-20 and passport, reviewed them, then returned them to me and directed me to another window to get my fingerprints taken. There, I encountered an American staff member who first asked me to scan the back of my passport (where the barcode was attached) at the window, then asked me to place the four fingers of my left hand, excluding the thumb, on a small scanner emitting a green light to take the fingerprints, followed by the same with my right hand, and finally both thumbs together. After that, I was directed to another window to start the actual interview. The staff there would also tell you which window to approach.

    Then, at window 15 (where one of my companions was just ahead of me), I met the visa officer (also an American):

    The visa officer looked at my passport and I-20 and didn’t check anything else. Then he asked me four questions sequentially:

    1. What’s your major?
    2. Who will be your sponsor?
    3. What do they do?
    4. Have you been to the U.S. before?

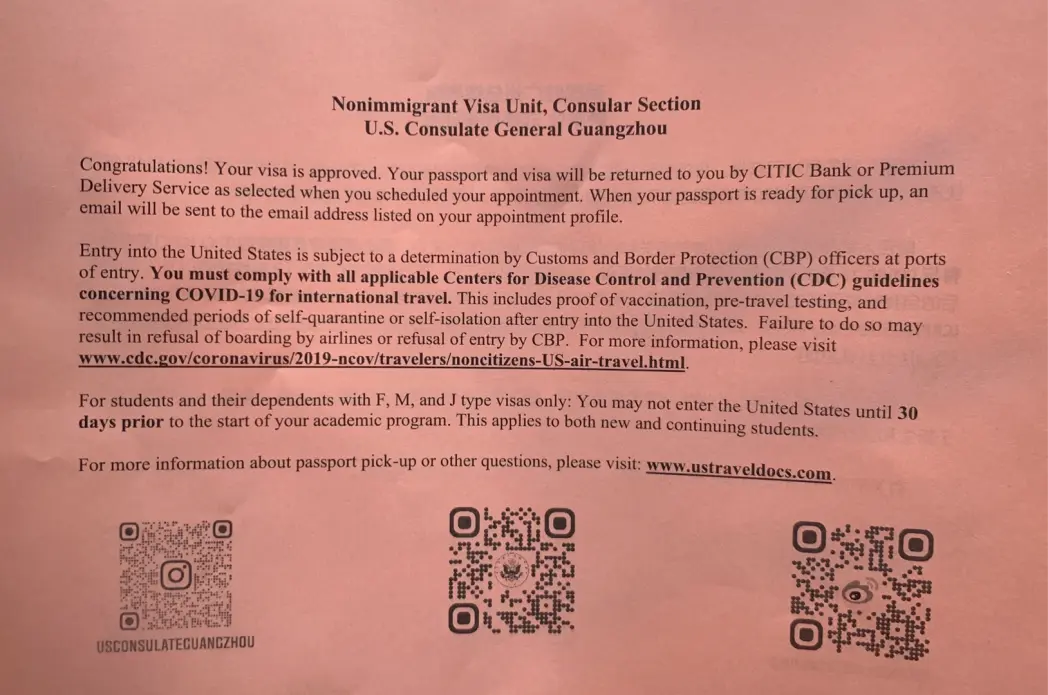
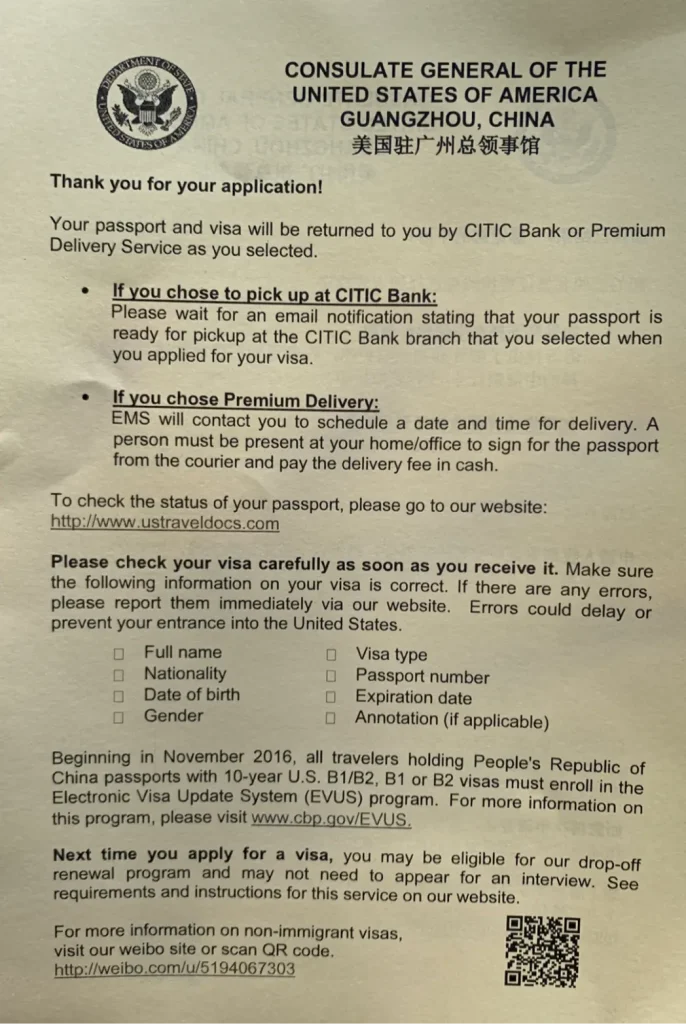
    After that, he took my passport and gave me two small slips, one pink and one yellow:

    These two slips indicated that my visa had been approved and that my passport and visa would be mailed back to me (though I could also choose to pick them up myself). Then we left, showed our storage claim tickets at the newsstand, retrieved our books and cellphones, and paid a storage fee of 30 yuan.

    Pages: 1 2


  • Summation by Parts (Abel Transformation)

    Summation by Parts (Abel Transformation)

    Note: This post is an English adaptation of my original Chinese article (URL). Some parts have been modified for clarity, cultural relevance, or to better fit the English-speaking audience. The original Chinese text is provided on the next page (2nd page) of this post for reference and comparison.

    Summation by Parts (Abel Transformation)

    $$\displaystyle {\sum^{n}_{i=1}}(a_i b_i)=\sum^{n-1}_{i=1}\left (\sum^{i}_{j=1}\left ( (b_{j}\right ) (a_{i}-a_{i+1})) \right ) + \sum^{n}_{i=1}\left (b_{i} a_{n} \right )$$

    Proof of Summation by Parts Formula

    Algebraic Proof

    $$\begin{align} &\displaystyle {\sum^{n}_{i=1}}(a_i b_i) \\ =& \sum^{n}_{i=1} \left ((a_i)\left ( -\sum^{i-1}_{j=1}b_j + \sum^{i}_{j=1}b_j\right )\right) \\ =& + a_1 \color{blue}{\sum^{1}_{j=1}b_j} – a_2 \color{blue}{\sum^{1}_{j=1}b_j} \\& + a_2 \color{red}{\sum^{2}_{i=1}b_j} – a_3 \color{red}{\sum^{2}_{i=1}b_j} \\ &+\cdots \\ &+ a_{n-2} \color{green}{\sum^{n-2}_{i=1}b_{j}}- a_{n-1} \color{green}{\sum^{n-2}_{i=1}b_{j}} \\ &+ a_{n-1} \color{purple}{\sum^{n-1}_{i=1}b_{j}} – a_{n} \color{purple}{\sum^{n-1}_{i=1}b_{j}} \\ & + a_{n} \color{brown}{{\sum^{n}_{i=1}b_{j}}} \\ =&+ (a_1 – a_2) \color{blue}{\sum^{1}_{j=1}b_j} \\&+(a_2 – a_3) \color{red}{\sum^{2}_{j=1}b_j} \\&+ \cdots \\&+ (a_{n-2} – a_{n-3}) \color{green}{\sum^{n-2}_{j=1}b_j} \\&+ (a_{n-1} – a_{n-2}) \color{purple}{\sum^{n-1}_{j=1}b_j} \\&+ a_{n} \color{brown}{{\sum^{n}_{i=1}b_{j}}} \\=& + \sum^{1}_{j=1}\left (b_j(a_1 – a_2) \right ) \\&+ \sum^{2}_{j=1}\left ( b_j(a_2 – a_3) \right ) \\&+ \cdots \\&+ \sum^{n-2}_{j=1}\left ( b_j(a_{n-2} – a_{n-3})\right ) \\&+ \sum^{n-1}_{j=1}\left ( b_j(a_{n-1} – a_{n-2})\right ) \\&+ \sum^{n}_{i=1}(b_{j}a_{n}) \\=& \sum^{n-1}_{i=1}\left (\sum^{i}_{j=1}\left ( (b_{j}\right ) (a_{i}-a_{i+1})) \right ) + \sum^{n}_{i=1}\left (b_{i} a_{n} \right )\end{align}$$

    $\Box$

    Geometric Proof

    天才“阿贝尔”的灵感:梯形面积计算,直观地理解“阿贝尔公式” —— by Bilibili uploader:究尽数学

    $\Box$

    Problem

    1. Please apply “Summation by Parts” to prove the sum of squares of $n$ natural numbers formula: $1^2+2^2+ \cdots + (n-1)^2 +n^2 =\dfrac{2n^3+3n^2+n}{6}$

    Answer

    Reveal

    1. Proof $$\begin{align} \quad &1^2+2^2+ \cdots + (n-1)^2 +n^2 = \displaystyle \sum ^{n}_{i=1}i^2 \\=& \sum^{n-1}_{i=1}\left (\sum^{i}_{j=1}j(i-(i+1)) \right ) + n \sum^{n}_{i=1}i \\=&-\sum^{n-1}_{i=1}\left ( \sum^{i}_{j=1}j \right )+ n \sum^{n}_{i=1}i \\=& -\sum^{n-1}_{i=1}\left (\frac{(1+i)i}{2}\right ) + n \sum^{n}_{i=1}i \\=& -\frac{\displaystyle \sum^{n-1}_{i=1}i^2+\sum^{n-1}_{i=1}i}{2}+n \sum^{n}_{i=1}i \\=& -\frac{\displaystyle \sum^{n}_{i=1}i^2+\sum^{n-1}_{i=1}i-n^2}{2}+n \sum^{n}_{i=1}i \\\implies & \sum ^{n}_{i=1}i^2= -\frac{\displaystyle \sum^{n}_{i=1}i^2+\sum^{n-1}_{i=1}i-n^2}{2}+n \sum^{n}_{i=1}i \\ \implies & 3\sum ^{n}_{i=1}i^2= -\sum^{n-1}_{i=1}i+n^2+2n \sum^{n}_{i=1}i \\ \implies & \sum ^{n}_{i=1}i^2=\frac{-\frac{n(n-1)}{2}+n^2+(n+1)n^2}{3} \\ \implies & \sum ^{n}_{i=1}i^2=\frac{-n^2+n+2n^2+2n^3+2n^2}{6} \\ \implies & \sum ^{n}_{i=1}i^2=\frac{2n^3+3n^2+n}{6} \end{align}$$

    $\Box$

    Note:If you made the following transformation when solving the problem 1:

    $$-\sum^{n-1}_{i=1}\left ( \sum^{i}_{j=1}j \right )=-\sum^{n-1}_{i=1}i^2+n\sum^{n-1}_{i=1}i$$

    then you will transform it back to the original state of expression.

    Pages: 1 2


  • Some advice for the new learners to Python

    Some advice for the new learners to Python

    Note: This post is an English adaptation of my original Chinese article (URL). Some parts have been modified for clarity, cultural relevance, or to better fit the English-speaking audience. The original Chinese text is provided on the next page (2nd page) of this post for reference and comparison. I hope this translation bridges the understanding for those interested in computing concepts across different languages and cultures 🙂

    In ‘Learn Python the Hard Way’, it is advised that beginners should not use the IDLE that comes with Python. By following this advice, newbies will download other IDEs such as Sublime Text, Atom, Visual Studio Code, etc., and then set up the Python environment, install various related plugins, and subsequently learn some related shell commands in the CLI terminal to open and run Python files.

    However, from my personal perspective, although this advice helps Python beginners to better understand how Python files are run in a CLI interaction mode and accelerates learning efficiency with the help of various plugins, it also aids them in learning some shell commands and understanding some IDEs or their processes of running Python and their relationship with Python. On the other hand, starting off relying on various IDE features such as auto-completion, syntax hints, and even automatic formatting, could lead to Python beginners not having a solid foundation in learning Python. Additionally, many Python beginners start learning Python mainly for programming and might not need to initially delve into certain computer science concepts. Personally, I prefer to place this knowledge learning later since when I self-taught Python as a child, I found the initial “setting up a Python environment in an IDE” to be very troublesome as I didn’t understand what “environment setup” really meant. I simply followed the steps in the books or videos, like a thoughtless robot, and ended up failing anyway. It was very frustrating, especially since I was young and clueless about how to fix errors, leading me to give up in the end.

    To give another example, a first-grade math curriculum wouldn’t start with teaching Peano’s axioms or mathematical logic, let alone mathematical analysis, as these are too abstruse. Human cognitive development is not simply from the bottom to the top; neither is it linear — it might start with understanding logarithmic functions before moving to exponential ones. Thus, we should first let children grasp the simplest and most intuitive knowledge, like memorizing 1+1=2, before gradually delving into deeper and higher levels of mathematics. I believe this learning approach is most effective. After all, for an intelligent person, the method of learning is as important as the ability to learn. We need to choose the right method of learning for our current ability to achieve the most efficient progress.

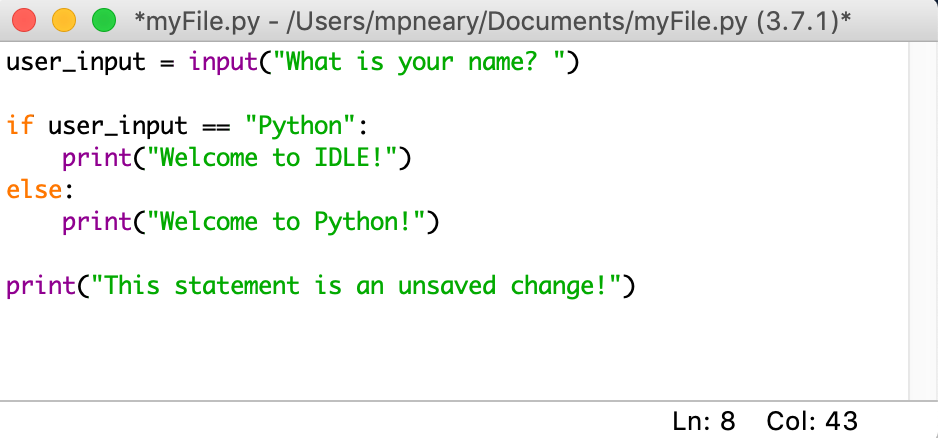
    Therefore, I think beginners could actually start with Python’s own IDLE, as it doesn’t have any fancy stuff; just create a file, type in the code according to Python syntax, save it, and then run it, with the output displaying in the IDLE shell window. The steps are straightforward and entirely in line with most beginners’ wishes.

    However, I don’t support the long-term use of IDLE for learning Python code. As learning progresses, I believe Python learning requires some plugin support, such as syntax and format checking, and various debugging tools to enhance learning efficiency. Sticking with IDLE could cement poor formatting and other bad programming habits, which could become troublesome to change later. For example, when I was younger, I used to place my left hand on ‘asdf’ and my right hand fingers on ‘hjkl’, which I found odd due to the semicolon ‘;’ placement. This habit formed, and later, I realized it was inconvenient as my index fingers would cross and collide, and my right pinky would become very tired, forcing myself to correct this habit later, which was quite challenging. It’s better to start with the correct methods from the beginning, isn’t it? (While learning ability is important, choosing the right direction of effort is equally crucial).

    So, you could consider that moving from IDLE to an IDE is a step up for Python learners. IDLE can be seen as a simple environment just for beginners to meet basic programming needs, while an IDE is an environment for learners to truly understand and learn programming.

    After all, once learners reach a certain level, I believe they won’t always be satisfied with the requirements of the programming language alone; they’ll also need to delve into other related computer science knowledge. So, I think if beginners have roughly mastered the basics of Python and have become a little proficient, they can then switch from IDLE to an IDE for further learning. Because an IDE is really convenient, with the support of various plugins, the efficiency of writing code can be greatly improved, and it can even motivate and help learners to understand more about the underlying computer science. After I successfully set up a Python environment with Atom, I started searching for many related Python plugins such as Hydrogen, Kite, Linter-flake8, Minimap, and Python-runner (I think that’s the name? Anyway, it can display output directly in Atom on Mac, but can’t handle input), and also learned about different shell language syntax, gaining some one-sided understanding of different operating systems and various interaction methods (CLI or GUI), and even thought about playing with Raspberry Pi, setting up my own server, creating a blog site, writing automation scripts, or even making my own games (if possible, I would also like to try hacking for fun).

    Pages: 1 2


  • A Simple Analogy to Understand Terminal, Shell, TTY, and Console

    A Simple Analogy to Understand Terminal, Shell, TTY, and Console

    Note: This post is an English adaptation of my original Chinese article (URL). Some parts have been modified for clarity, cultural relevance, or to better fit the English-speaking audience. The original Chinese text is provided on the next page (2nd page) of this post for reference and comparison. I hope this translation bridges the understanding for those interested in computing concepts across different languages and cultures 🙂

    In the world of computing, terms like terminal, shell, tty, and console are often thrown around, but their distinctions can be subtle and confusing. Before we dive deeper, let’s define these terms briefly:

    • TTY: Stands for teletype, the original terminal devices. The term tty has become a generic name for terminals.

    • Terminal: A piece of “hardware” or “software” (terminal emulator) dedicated to human-computer interaction.

    • Console: A higher-level terminal with special permissions, capable of displaying messages that regular terminals cannot.

    • Shell: Software that interprets commands for the kernel, the core of the computer’s operating system.

    If these definitions seem baffling, don’t worry. I’ll explain them using a simplified and relatable analogy.

    The Kingdom Analogy

    Imagine a kingdom (the operating system of your computer) ruled by a king (the kernel). One day, a foreign merchant (the computer user) wishes to trade with the kingdom. However, there’s a language barrier, as the merchant does not understand the kingdom’s language (computer commands).

    To solve this, the king employs a translator (the shell), who can interpret between the king and the merchant. However, the king decides that the merchant should stay outside the city walls, communicating via a messenger (the terminal).

    The merchant might wonder, “Why can’t I speak directly to the translator?” The king’s policy is that direct communication is reserved for insiders. In real-life computing, when you open a terminal emulator, it automatically calls upon the shell, but I’ve separated them into two entities here for clarity.

    Now, let’s play out a scenario:

    The merchant says, “I want to buy an apple for 1 shell.” (Note: Here, ‘shell’ amusingly refers to a seashell, not the computing term haha.)

    The messenger relays this to the translator (the terminal sends the command data to the shell), who then translates this into the king’s language (the shell interprets the command). The translator informs the king: “He wants to buy an apple with 1 shell.”

    Upon hearing this, the king commands, “Give him an apple for one shell.” (The kernel processes the command and returns the result.)

    The translator translates the king’s command back into English and informs the messenger, who then tells the merchant, “Yes, you can have an apple. Please place the shell on the ground.” (The terminal outputs the execution result to the user, completing 1 interaction loop.)

    Pages: 1 2